

♥ Wishlist
Compare 60 Studio Lighting Equipment for Photography, Video and Content Creation products in Canada. Reviews, ratings, pros, cons and buying advice updated for October 2026.
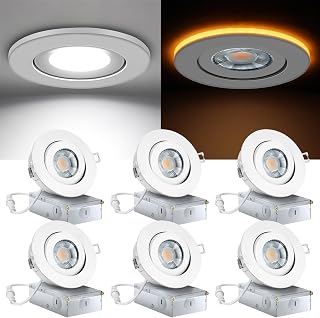


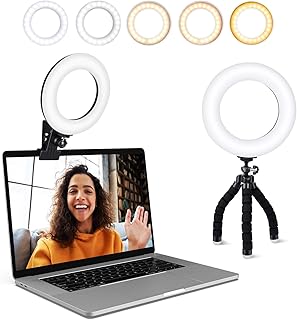


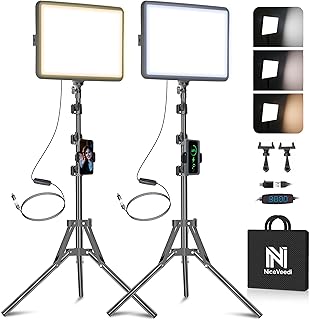






Finding the right studio lighting setup is about more than choosing the brightest fixture or the lowest advertised price. A good buying decision balances light quality, colour accuracy, brightness control, mounting options, power requirements, portability, durability and the type of photography or video work you plan to create.
For Canadian buyers, it is also worth checking voltage compatibility, included accessories, delivery options, retailer policies and the actual contents of each lighting kit before purchasing. Two products with similar-looking specifications can offer very different value when one includes stands, softboxes, remote controls or other essential accessories and the other requires them to be purchased separately.
This guide explains what to look for when comparing smart studio lighting deals in 2026, including LED panels, COB lights, softboxes, ring lights, RGB fixtures, portable lighting and complete studio kits. Brands commonly considered in the studio-lighting market include Godox, Neewer, GVM, Elgato, Nanlite, SmallRig, Aputure and Philips Hue, although the right choice depends on your particular setup rather than brand name alone.
A smart purchase is not necessarily the cheapest studio light. Instead, it is the product that provides the right combination of performance and useful features for the money you spend.
For example, a beginner creating YouTube videos may benefit more from an easy-to-position LED panel with adjustable brightness than from an extremely powerful professional fixture. A portrait photographer may place greater importance on colour accuracy, soft light modifiers and reliable stands. A streamer might prioritise compact dimensions, app control and desktop mounting.
Bi-colour LED panels are one of the most versatile choices for home studios, interviews, product photography and online content. They typically allow the user to adjust colour temperature between warmer and cooler light, making it easier to match daylight, room lighting or a desired visual style.
Panels are particularly useful when you need broad, relatively even illumination. Their flat design also makes them easier to position in smaller rooms than some large COB fixtures with oversized modifiers.
When comparing LED panels, examine brightness at a stated distance, dimming range, colour-temperature range, colour-rendering specifications, power source, mounting system and included diffusion.
COB, or chip-on-board, LED fixtures are popular when concentrated light output and modifier compatibility are important. Many models use a Bowens-style mount or another modifier system, allowing photographers and videographers to shape the beam with softboxes, reflectors, grids and other accessories.
A COB light can be an excellent choice for a key light because a modifier can turn a relatively concentrated source into a large, soft light. However, the complete setup can be larger and less portable than a compact LED panel.
RGB lighting provides creative control beyond conventional white light. It can be useful for backgrounds, accent lighting, coloured product scenes, music content, gaming rooms and cinematic video production.
Some RGB fixtures provide hue, saturation and brightness controls, while more advanced models may offer additional colour modes or lighting effects. The important question is whether you actually need those features. If most of your work involves natural-looking interviews or product images, paying extra for extensive RGB effects may not provide meaningful value.
A softbox kit can be an economical way to create softer, more flattering illumination. The diffuser spreads light over a larger apparent source, reducing harsh shadows and producing a smoother appearance on faces and reflective subjects.
Complete kits may include one or more lights, stands, softboxes, diffusers and carrying bags. Before comparing two kits, identify exactly what is included. A lower-priced kit may appear attractive until essential stands, bulbs, adapters or modifiers must be purchased separately.
Ring lights remain useful for close-up video, beauty content, video calls, tutorials, livestreaming and social-media production. Their circular design can produce distinctive catchlights in the eyes while providing relatively even illumination around the subject.
A ring light is convenient, but it is not automatically the best main light for every studio. For full-body portraits, cinematic video or situations requiring directional shadows, a panel or COB light with a suitable modifier may offer greater creative control.
Compact LED lights are useful for creators who shoot in multiple locations. Their small footprint makes them suitable for travel, mobile product photography, behind-the-scenes work and quick supplemental lighting.
When evaluating portable fixtures, battery performance can be just as important as LED output. Check charging requirements, battery capacity where specified, mounting points, physical controls and whether the light can operate while charging.
LED tubes can provide both practical illumination and creative accent lighting. Their elongated shape makes them useful for background highlights, edge lighting and narrow spaces where conventional panels may be difficult to position.
Some models provide RGB control, wireless operation and built-in effects. For a practical studio setup, consider how the tube will be mounted and powered rather than focusing only on its visual appearance.
Desktop lights are designed around the needs of streamers, remote workers, educators, podcasters and creators who sit close to a camera. Compact LED panels and small key lights can provide controlled illumination without requiring full-size photographic stands.
Look for adjustable brightness, colour temperature, stable mounting, a suitable desk clamp or stand and controls that can be accessed without interrupting your workflow.
Elgato is one brand worth considering when evaluating creator-focused lighting ecosystems, while Neewer and SmallRig offer a broad range of equipment across different studio applications.
Smart lighting becomes particularly useful when you regularly change brightness or colour settings. Wireless and app-based controls can reduce the need to physically reach a light, which is helpful when fixtures are mounted high or positioned behind a subject.
However, smart functionality should be treated as an additional feature rather than a substitute for good optical performance. A light with excellent connectivity but unsuitable brightness, poor colour quality or an inconvenient mounting system may still be a poor purchase.
A complete kit can make sense for buyers starting from scratch. A two-light or three-light configuration can provide considerably more flexibility than relying on one fixture.
A typical multi-light arrangement can use one main light, one fill light and an optional background or rim light. This allows you to control the subject and background separately instead of trying to solve every lighting problem with a single source.
The choice between an LED panel and a COB fixture depends largely on how you want to shape light.
Neither technology is universally better. The best option depends on room size, subject distance, desired softness, camera position and the type of content being produced.
Colour temperature is normally expressed in Kelvin, abbreviated as K. Lower values generally produce warmer-looking light, while higher values generally produce cooler-looking light.
A fixture with adjustable colour temperature can be particularly convenient in rooms containing a mixture of daylight and artificial lighting. It can also help maintain a consistent appearance when shooting at different times of day.
For professional-looking footage, consistency matters. If one light is noticeably warmer or cooler than another, skin tones and background colours can become difficult to balance during editing.
Colour-rendering specifications help indicate how accurately a light reproduces colours compared with a reference source. CRI is commonly encountered in lighting specifications, while TLCI is particularly associated with television and video applications.
Do not select a studio light solely because it advertises a high CRI or TLCI figure. Look at the complete specification sheet and consider whether the manufacturer clearly explains the measurement conditions. For product photography, portraits and commercial video, reliable colour reproduction can be more valuable than simply maximising brightness.
One of the most common buying mistakes is comparing wattage as if it directly represents brightness. Electrical power consumption and light output are different measurements.
Lux can be particularly useful when evaluating illumination at a specified distance, while lumens describe total visible light output. However, figures should only be compared carefully when the testing conditions and measurement methods are comparable.
Also consider beam angle and modifiers. A fixture can produce a strong concentrated beam, while another may distribute its output across a wider area. The practical brightness on your subject can therefore differ substantially even when headline specifications appear similar.
Photography requirements vary according to subject and shooting style.
Video introduces additional considerations because the lighting remains active throughout recording. Fan noise, flicker performance, colour consistency and power management can therefore become important.
For talking-head videos, a large soft key light placed slightly above and to one side of the camera can provide a natural starting point. A weaker fill source can reduce unwanted contrast, while a separate background light can create visual separation.
For interviews, pay particular attention to operating noise. A powerful fixture that produces noticeable fan noise may be less suitable for close-microphone recording than a quieter alternative.
A classic three-point lighting arrangement uses a key light, fill light and backlight. It is not a mandatory formula, but it provides a useful framework for building a controlled studio setup.
You can achieve the same basic concept with different fixture types. A COB light with a softbox can serve as a key, while compact LED panels can function as fill or background lights.
Small rooms benefit from equipment that is easy to reposition. Oversized stands, deep softboxes and long power cables can quickly make a compact studio difficult to navigate.
Before buying, measure the available shooting area and consider where the camera, subject, desk and lighting stands will be placed. A smaller fixture with flexible mounting can sometimes be more practical than a larger light with higher theoretical output.
Wall colour and ceiling height also influence the result. Light-coloured surfaces can bounce light around the room, while darker environments generally give you more control over where illumination falls.
The light itself is only part of a safe and useful setup. A stand must support the fixture and modifier without becoming unstable.
Modifiers change the character and direction of light. A softbox generally creates softer illumination by increasing the apparent size of the source, while grids help restrict spill.
When buying a softbox, verify the mount type before ordering. Bowens-compatible accessories are widely used, but compatibility should never be assumed solely from product photographs.
Also consider the shape. Rectangular softboxes can be useful for portraits and general-purpose lighting, strip-style modifiers can provide narrower illumination, and octagonal designs can produce distinctive catchlights.
Modern studio lighting can include features that simplify repeated setups. Some are genuinely useful, while others may have little practical value for your workflow.
For a permanent home studio, AC-powered lighting is usually straightforward. For location work, battery-compatible fixtures can be more convenient.
Canadian buyers should confirm the power requirements of imported equipment before purchasing. Check the manufacturer's electrical specifications and make sure the supplied power equipment is appropriate for the intended installation.
USB-powered lights can be convenient for desktop use, but their compact power requirements may also limit maximum output. Do not assume that USB power automatically makes a fixture suitable as a primary studio light.
Wattage indicates electrical consumption, not a complete picture of useful illumination. Compare appropriate light-output specifications under comparable conditions.
A powerful light becomes less useful if you cannot easily attach the modifier you need. Confirm compatibility before buying accessories.
Product images can make a kit appear comprehensive. Always read the included-items list and determine whether stands, bulbs, diffusers, reflectors, remotes and power supplies are actually included.
Unstable stands can make a good light difficult to use. Match the stand to the weight and dimensions of the fixture and modifier.
Cooling fans may be acceptable for photography but problematic for dialogue-heavy video. Check the manufacturer's information and user feedback where available.
RGB effects, app control and extensive presets can be attractive, but they should not take priority over light quality, reliability and appropriate output.
A light may appear inexpensive until you add a stand, softbox, reflector, diffuser, mounting adapter and carrying case. Compare complete setup costs rather than only the headline product price.
Brand comparisons can help narrow a shortlist, but there is no universal winner across every price category and application.
The most useful comparison is therefore model against model. Examine output, colour specifications, controls, mounts, included accessories, dimensions, power requirements and verified customer feedback rather than selecting solely by brand reputation.
When evaluating a deal, use the same checklist for every product. This reduces the risk of being influenced by an attractive headline discount while overlooking missing accessories or weaker specifications.
Customer reviews can reveal practical information that a specification sheet does not always communicate. However, review quality matters more than review quantity.
Look for repeated comments about build quality, brightness consistency, colour performance, overheating, fan noise, stand stability, controls and long-term reliability. A single unusual complaint should not automatically determine your decision, but repeated reports of the same issue deserve attention.
Also distinguish between reviews of the exact model and reviews of similar products from the same brand. Product generations can change, so make sure the feedback relates to the model you are considering.
Product photography requires careful control of reflections, shadows and colour. Shiny products can be particularly challenging because they may reflect the shape of the light source rather than simply showing the light itself.
Large diffused sources can help create smoother reflections on many products, while flags and grids can help prevent unwanted spill. For small products, compact panels can be positioned precisely around a tabletop scene.
When colour accuracy matters, choose lighting with credible colour-rendering specifications and maintain consistent settings between shots.
Portrait lighting is strongly influenced by the size, position and distance of the light source. Moving a soft light closer to the subject can create a different look from moving the same light farther away.
Instead of searching only for the most powerful fixture, consider whether the light accepts a modifier that suits your preferred portrait style. A well-controlled moderate-output fixture can be more useful than a powerful light that is difficult to soften or position.
Creators often need lighting that can be set up quickly and reproduced consistently. Adjustable colour temperature is useful when room conditions change, while dimming allows exposure to be controlled without moving the light.
For a talking-head setup, start by placing the main light at an appropriate angle and height, then adjust distance and intensity. Avoid placing the light directly below the camera unless the resulting shadow pattern is intentional.
Streaming setups often combine a flattering key light with RGB background lighting. The key light should illuminate the face without producing distracting glare, while coloured fixtures can add separation and visual interest behind the subject.
Desk-mounted lights are convenient when floor space is limited. If using several smart fixtures, compatibility between their control systems can be more important than having advanced features on every individual light.
You do not need to purchase an extensive lighting system immediately. A sensible approach is to start with one reliable key light and add equipment as your needs develop.
Expensive equipment cannot compensate for poor positioning. Before upgrading, experiment with light height, distance, angle and diffusion.
Use curtains, walls, reflectors or inexpensive flags to control spill. Move the subject farther from the background when you need more separation. Keep lighting consistent between takes when recording a multi-part project.
Good technique can make an affordable fixture significantly more useful, particularly when the light offers basic brightness and colour controls.
Studio lights generally benefit from sensible handling and clean storage. Dust can accumulate around ventilation openings, while repeated transport can place stress on stands, cables and mounting hardware.
Lighting equipment should be positioned so that stands, cables and modifiers do not create avoidable hazards. Tall stands can become unstable if overloaded or placed where they may be knocked.
Keep electrical connections appropriate for the equipment and avoid routing cables through walking paths where possible. Follow the manufacturer's operating instructions, particularly for fixtures that generate substantial heat.
For larger or heavier fixtures, use appropriate support and stabilisation equipment. Never assume that a lightweight stand is suitable simply because the light itself appears compact.
The right budget depends on your objectives. Beginners can start with a straightforward LED panel or compact kit, while more advanced creators may benefit from investing in a complete ecosystem of lights and modifiers.
Instead of setting a budget around a particular brand, divide your available spending between the components that influence your results most: the light source, modifier, stand and control system.
If your setup will remain in one location, you may prefer to spend more on light quality and modifiers. If you frequently travel, portability and battery flexibility may justify choosing a smaller system.
The best beginner option depends on the type of content you create. A dimmable LED panel is a straightforward starting point for many home studios, while a COB light with a softbox can provide greater flexibility for creators who want to develop a more advanced setup.
Yes. LED panels can work well for portraits, product photography, interviews and content creation. Their usefulness depends on output, colour quality, diffusion, positioning and the size of the subject.
Neither is universally better. COB fixtures are often attractive when you want directional output and extensive modifier compatibility, while LED panels can be easier to position and use when broad illumination and compact dimensions are priorities.
RGB lighting is worthwhile when you create content that benefits from coloured backgrounds, accent lighting or visual effects. If your priority is natural-looking portraits or interviews, a high-quality white or bi-colour fixture may provide better value.
There is no single ideal setting. The appropriate colour temperature depends on the environment and the look you want to achieve. Bi-colour lights provide additional flexibility when working between warm indoor lighting and cooler daylight.
Not necessarily. One good key light can produce excellent results when positioned carefully. A second light becomes useful when you want additional control over shadows, background illumination or subject separation.
A softbox diffuses and spreads light, creating a larger and softer source. This can produce more flattering illumination for portraits and smoother reflections for many product subjects.
Ring lights can be useful in professional applications, particularly for close-up work and beauty-related content. However, they may not provide the same directional control as a conventional light with a softbox or other modifier.
Check output, colour specifications, dimming, colour-temperature control, included accessories, stand quality, mounting compatibility, power requirements, dimensions and user feedback. Always confirm exactly what is included in the package.
Studio lighting specifications, product generations, retailer pricing and available configurations can change. For a 2026 buying guide, product information and current pricing should be checked again before making a purchase.
The best smart studio lighting deal is the one that fits your actual workflow rather than the one with the longest feature list. Start by deciding whether you primarily need portrait lighting, product illumination, streaming light, video lighting, portable equipment or a complete multi-light studio.
Then compare brightness, colour accuracy, colour-temperature control, modifiers, mounting options, power requirements and included accessories. Consider the complete setup cost and read recent verified customer reviews before making a final decision.
For Canadian shoppers, always confirm the current model specifications, retailer terms, electrical compatibility and today's price before purchasing. Product availability and deals can change throughout 2026, so the most useful comparison is based on the exact product configuration available at the time you buy.